
Desserts
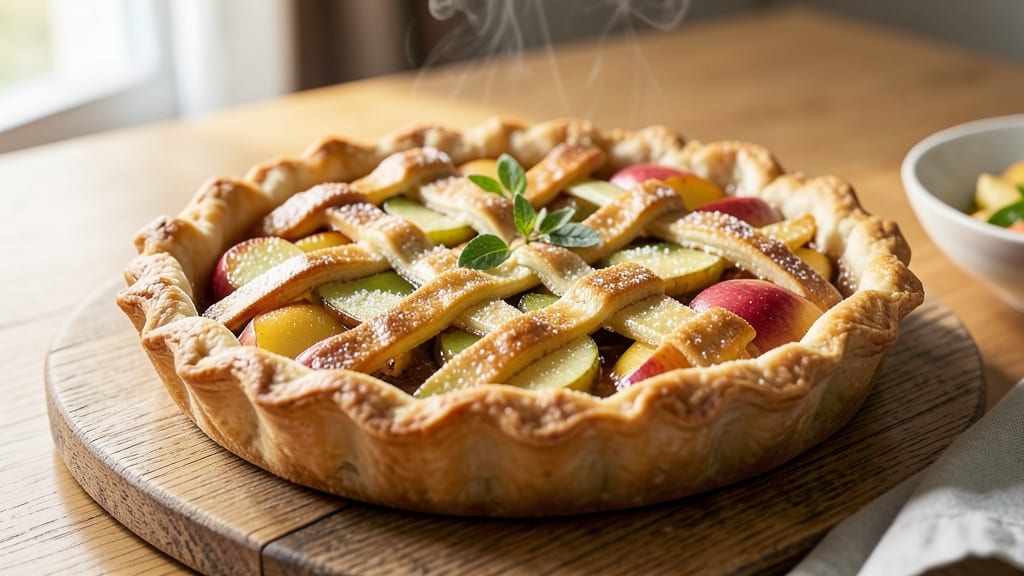
This small homemade apple pie recipe delivers all the warmth of a classic dessert without the holiday-level commitment. 🍏 Perfect for weeknight cravings or intimate gatherings, it’s designed to bake in under an hour—no fancy equipment or all-day prep required.
The secret lies in a simple lattice crust (or store-bought shortcut) that stays crisp while encasing tender, spiced apples in a golden, flaky embrace.
What sets this recipe apart is its balance of tradition and convenience: you can use a pre-made crust for speed, or roll out your own for that homemade touch.
The filling combines sweet-tart apples with cinnamon, brown sugar, and a touch of lemon to brighten the flavors, while a light cornstarch slurry ensures a thick, glossy finish. It’s the kind of pie that feels special but won’t overwhelm your schedule.
The result is a mini-sized masterpiece—golden crust edges, a bubbling apple filling that’s just tender enough, and a caramelized top that smells like autumn in every bite.
Serve it warm with vanilla ice cream or whipped cream, and you’ll have a dessert that tastes homemade but fits seamlessly into a busy weeknight routine.
Whether you’re baking for one or a small gathering, this recipe scales effortlessly. The lattice design adds visual appeal while keeping the center soft, and the crust holds its shape beautifully.
No more waiting for a full pie to cool—just slice, serve, and enjoy the comfort of homemade dessert without the fuss.
Ingredients for small homemade apple pie
Six apples, one crust, and a handful of pantry staples—this mini pie is simpler than it looks.
| Ingredient | Amount | Notes |
|---|---|---|
| Granny Smith Apples 🍏 | 3 medium | Peeled and thinly sliced |
| Honeycrisp Apples 🍏 | 3 medium | Peeled and thinly sliced |
| All-Purpose Flour 🌾 | 1 ½ cups | Plus 2 tbsp for dusting |
| Unsalted Butter 🧈 | ¾ cup | Cold, cubed for crust |
| Granulated Sugar 🍚 | ¾ cup | For crust and filling |
| Brown Sugar 🍚 | ½ cup | Packed for filling |
| Ground Cinnamon 🌿 | 2 tbsp | Plus 1 tsp for filling |
| Lemon Juice 🍋 | 2 tbsp | Freshly squeezed |
| Cornstarch 🌾 | 2 tbsp | For filling slurry |
| Salt 🧂 | ½ tsp | Fine sea salt |
| Vanilla Extract 🥛 | ½ tsp | Pure alcohol-free preferred |
| Vanilla Ice Cream 🍦 | 1 cup | For serving (optional) |
The apples are everything here. Granny Smith adds tartness to balance the sweetness, while Honeycrisp brings that juicy crunch—both should be firm but not rock-hard. Whole Foods or Trader Joe's usually have the best selection, but any grocery store's produce section works. Skip the pre-sliced bags—those apples turn mushy fast. Thin slices (about 1/8-inch) cook perfectly without turning to applesauce. If you can't find Honeycrisp, Fuji or Gala are great backups, but avoid Red Delicious—they're too mealy.
No vanilla extract? Vanilla bean paste works in a pinch, or just skip it. The cornstarch slurry is non-negotiable though—it's what gives that glossy, thick filling. No cornstarch? Arrowroot powder at the same amount does the job. For the crust, store-bought is totally fine if you're short on time, but rolling your own with cold butter gives that professional flake. Pro tip: Chill your butter cubes for 30 minutes before mixing—they should hold their shape but still crumble easily. The ice cream? Any flavor works, but vanilla's classic for a reason.
This pie keeps beautifully—3 days at room temp if wrapped tightly, 5 days in the fridge, or 3 months frozen. The crust stays crisp even after reheating, so it's perfect for make-ahead dessert. I always bake mine in a 9-inch pie dish for single servings, but you can double the recipe for a standard 9-inch pie. Freezing tip: Wrap the whole pie in parchment, then foil, to prevent freezer burn. Thaw overnight in the fridge before serving.
Why You'll Love This Recipe
- No-Roll Crust Hack: I swear by this trick—just mix cold butter into the flour until it looks like crumbs, then add ice water. No chilling, no stress, and that flaky magic still happens. My crust comes together faster than I can put on coffee.
- Tart-Sweet Magic: Granny Smiths add that bright, tangy bite while Honeycrisp melts into buttery perfection. A sprinkle of cinnamon on top? That’s the secret weapon—simple, but it turns "good" into "I’ll have seconds."
- Leftovers for Days: Bake one, eat two. This recipe makes a single pie, but it reheats like a dream—warm slices with vanilla ice cream or pack them for lunch. Honestly, I’ve had this pie last me a week, and it’s still the star of my breakfasts.
- Budget-Friendly Luxury: Butter crust, fresh apples, and just enough sugar to balance the tartness. No fancy ingredients, no wasted dough. I’ll be real: my grocery bill stays sane, but my kitchen smells like autumn every time. That’s a win.
Step-by-step instructions for small homemade apple pie
Here's how to make a perfect mini apple pie that's ready in under an hour.
👨🍳 Step 1: Prepare the Crust with Cold Butter
In a large bowl, combine the 1.5 cups all-purpose flour and 0.5 tsp salt. Cut in the 0.75 cup unsalted butter (cold and cubed) using a pastry cutter or your fingers until the mixture resembles coarse crumbs with pea-sized butter pieces. This texture is crucial—it ensures a flaky crust.
Sprinkle 2-3 tablespoons ice water, 1 tablespoon at a time, mixing gently with a fork until the dough just comes together when pressed. Knead lightly 3-4 times, then shape into a disk, wrap in plastic, and chill for 30 minutes. The cold dough prevents shrinking when rolled out later.
🍳 Step 2: Roll and Assemble the Crust
On a lightly floured surface, roll the chilled dough into a 9-inch circle (about ⅛-inch thick). Transfer to a 9-inch pie dish, pressing gently to fit. Trim excess dough, leaving a ½-inch overhang. Fold the overhang under itself to create a neat edge.
Chill the crust in the pie dish for 15 minutes while you prepare the filling. This prevents shrinking when you add the hot apple mixture. Preheat your oven to 375°F during this time—you'll need it ready for the bottom crust.
👨🍳 Step 3: Make the Apple Filling
In a large bowl, combine the peeled and thinly sliced 3 medium Granny Smith apples and 3 medium Honeycrisp apples. Toss with 0.75 cup granulated sugar, 0.5 cup packed brown sugar, 2 tbsp ground cinnamon, 1 tsp additional cinnamon, 2 tbsp lemon juice, and 0.5 tsp vanilla extract. The lemon juice brightens the apples while the cinnamon adds warmth.
In a small bowl, whisk together 2 tbsp cornstarch and 2 tablespoons cold water to make a slurry. Stir this into the apple mixture and let it sit for 10 minutes—this helps thicken the filling and prevent a runny pie. The filling should coat the back of a spoon but remain slightly loose.
🥘 Step 4: Fill and Bake the Pie
Spread the apple filling evenly into the chilled crust. Dot the top with remaining butter cubes for extra flavor and flakiness. Roll out the remaining dough to a 9-inch circle and place it over the filling. Trim excess, leaving a ½-inch border. Seal the edges by pressing with your fingers or using a fork to create a decorative pattern.
Cut 4-5 slits in the top crust to allow steam to escape. Bake for 45-50 minutes until the crust is golden brown and the filling bubbles through the slits. The edges should be set but the center can still jiggle slightly—it'll firm up as it cools.
⏰ Step 5: Cool and Serve
Let the pie cool for 1 hour before slicing—this allows the filling to set properly. The crust will firm up as it cools, making it easier to slice cleanly. Serve warm with 1 cup vanilla ice cream on the side for that classic pie-and-ice-cream combo.
Here's the thing—this mini pie is perfect for weeknight baking because it's ready in under an hour, and the small size means you won't have leftovers to worry about. Plus, the flaky crust and perfectly spiced apples make it taste like a bakery classic!
Pro Tips For Making Small Homemade Apple Pie
- CHILL THE APPLES FIRST: I learned this the hard way—peeling and slicing Granny Smiths and Honeycrisps straight from the fridge makes them gummy. Toss them in cold water for 10 minutes before cutting, then pat very dry. This keeps the filling crisp instead of turning into apple mush after baking.
- USE COLD BUTTER FOR CRUST: Your future self will thank you if you resist the urge to soften that butter with warm hands. Cut it straight from the fridge into the flour—small, pea-sized chunks work best. The cold butter creates flaky layers, not a greasy mess. (Yes, even if you're impatient like me.)
- SKIP THE TOPPING ON CRUST: I used to brush the crust with egg wash or milk, and it always turned out soggy. For a small pie, just fold the top crust edges under and crimp with a fork—no extra moisture needed. The apples release enough steam to get a golden crust without turning it into a wet blanket.
- BAKE LOW AND SLOW: After burning three batches, I finally figured out: 350°F (not 375°F) for 45–55 minutes is the sweet spot. The crust browns without burning, and the filling cooks through without turning to syrup. Use a pie shield or foil tent if your oven runs hot—this isn’t the time to rush.
Essential equipment for perfect results
Pie Dish Essentials
For this small pie, a 9-inch glass or ceramic pie dish is ideal—it distributes heat evenly and prevents soggy bottoms. I love Pyrex glass dishes because they're durable and heat up faster than metal.
Avoid dark-colored dishes, which can over-bake the crust edges. If you're making a single-serving pie, a ramekin or mini pie tin (like Wilton's 4-inch tins) works beautifully for individual portions. 🍏
Crust Tools
A rolling pin is a must for even crust thickness, but I often use a wine bottle in a pinch—just roll gently! For shaping, keep a pie crust cutter or round cookie cutter handy to trim excess dough neatly.
A bench scraper helps transfer dough to your pie dish without tearing. If you're short on time, a store-bought pie crust (like Pillsbury Golden Flaky) saves effort while still delivering great results.
Mixing & Measuring
Precision matters in pie baking, so invest in a good set of measuring cups (I prefer OXO Good Grips) and a digital kitchen scale for accurate flour and sugar measurements. A whisk and rubber spatula are essential for combining the filling ingredients smoothly.
For the cornstarch slurry, a small mixing bowl and measuring spoons ensure the right consistency. Don't skip the fine-mesh strainer if you're using pre-sliced apples—it removes seeds and skins for a cleaner filling. 🥄
Baking & Cooling
An oven thermometer is a game-changer—it ensures your oven is truly at 375°F (many run hot or cold). A pie cooling rack prevents soggy bottoms by allowing air circulation underneath. For lattice crusts, a sharp knife or pizza cutter makes clean, even cuts.
If you're freezing the pie, wrap it tightly in plastic wrap followed by aluminum foil to lock in freshness. A pie server with a serrated edge makes clean slices every time. 🔥
Optional Extras
Want to elevate your pie? A pastry brush helps paint egg wash for golden crust edges, and tongs make it easy to transfer hot pies from oven to rack. For serving, a small pie stand keeps it elevated and elegant.
If you're making multiple pies, a pie weights or dried beans prevent puffing during pre-baking. And for cleanup, keep paper towels and hot pads nearby—pie filling can be messy! ✨
Nutrition facts
Frequently asked questions
Can I make this mini pie without a lattice crust?
For a simpler version, just use a single top crust with a few slits for steam. Roll out the dough, place it over the filling, and cut decorative shapes or crisscross slits. Brush with egg wash for extra shine. No lattice? No problem—it'll still taste delicious!
What if I don't have a 9-inch pie dish?
Use a 9-inch oven-safe skillet or even a deep ramekin for single servings. For a lattice, cut strips about 1-inch wide and weave them over the filling. Just ensure your dish can handle 375°F heat safely.
Why does my crust get soggy?
Soggy crusts happen when steam escapes too quickly or the filling is too wet. Always pre-bake the bottom crust for 10 minutes before adding filling, and use the cornstarch slurry to thicken the apples. For extra insurance, sprinkle 1 tbsp sugar on the crust before filling.
Can I use frozen apples instead of fresh?
Yes, but thaw and drain them first to avoid excess moisture. Toss with a bit of lemon juice to brighten flavors. Frozen apples work best in recipes where texture isn't critical, like this pie's thick filling.
How do I make this recipe gluten-free?
Swap the all-purpose flour for a 1:1 gluten-free baking flour blend (like Bob's Red Mill). Add ½ tsp xanthan gum to the crust dough for structure. The filling stays the same—just ensure your cornstarch is gluten-free certified.