
Desserts
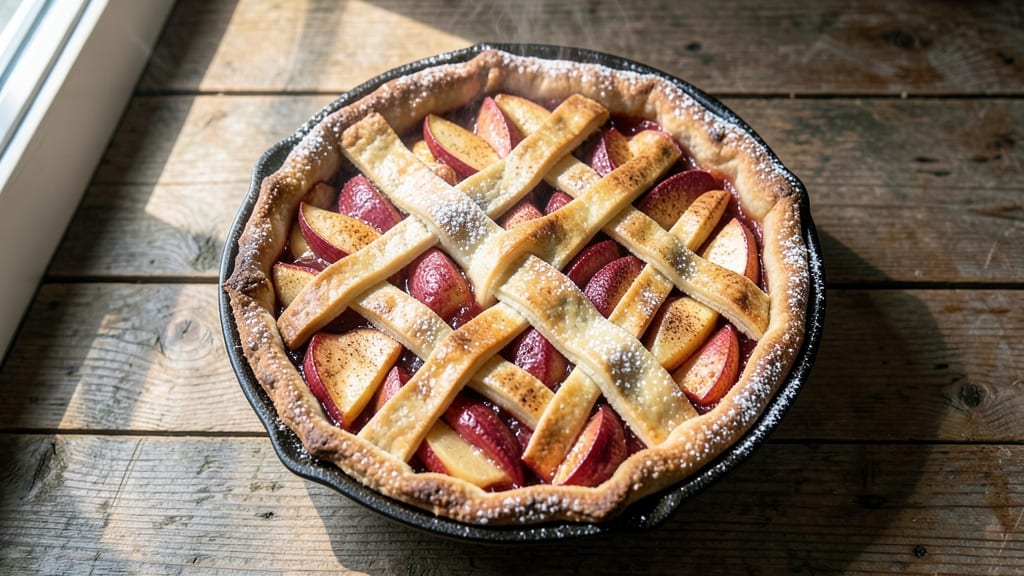
This rustic apple pie tart recipe delivers all the cozy comfort of classic apple pie with a modern twist—individual tarts that feature a perfectly buttery crust and spiced apple filling.
The secret lies in a simple yet foolproof pastry technique that creates a flaky, golden crust while maintaining a tender center, paired with apples that caramelize beautifully during baking.
I developed this recipe after years of perfecting homemade pie crusts, and these tarts are now my go-to for both weeknight desserts and special occasions.
The beauty of this recipe is in its balance—crisp yet tender crust, perfectly spiced apple filling that’s not too sweet, and a presentation that’s elegant without being fussy.
You’ll start with a basic shortcrust pastry that’s rolled out, cut into tart shells, and baked just until golden, creating sturdy bases for the filling. The apples are simmered with cinnamon, a touch of sugar, and lemon juice to enhance their natural sweetness, then baked until bubbly and fragrant.
What you’ll end up with is a dessert that’s equal parts nostalgic and refined—each tart offering a perfect bite of flaky crust, spiced apple filling, and a hint of caramelized sweetness.
The individual servings make these ideal for potlucks, dinner parties, or even a simple treat with a cup of coffee.
The recipe also leaves room for creativity: drizzle with a homemade caramel sauce, dust with powdered sugar, or serve with a scoop of vanilla ice cream for an extra touch of indulgence.
Ready in about 1 hour (including prep and baking), this recipe is designed to be approachable yet impressive. The instructions guide you through every step—from rolling the dough to baking the tarts—with tips to ensure your crust stays crisp and your filling stays perfectly spiced.
Whether you’re a seasoned baker or just starting out, these rustic apple pie tarts are a guaranteed crowd-pleaser.
Ingredients for rustic apple pie tart
Buttery crust, spiced apples, and a touch of caramelized sweetness—just 13 ingredients for perfect rustic tarts.
| Ingredient | Amount | Notes |
|---|---|---|
| All-Purpose Flour 🌾 | 2 ½ cups | Sifted for light texture |
| Unsalted Butter 🧈 | 1 cup | Cold, cubed for pastry |
| Granulated Sugar 🍚 | ¼ cup | Plus extra for sprinkling |
| Ice Water 💧 | ½ cup | Chilled for dough handling |
| Large Egg 🥚 | 1 whole | For egg wash |
| Ground Cinnamon 🌿 | 2 tsp | True Ceylon preferred |
| Ground Nutmeg 🌿 | ½ tsp | Freshly grated preferred |
| Apples 🍎 | 4 medium | Honeycrisp or Granny Smith |
| Lemon Juice 🍋 | 1 tbsp | Freshly squeezed |
| Light Brown Sugar 🍚 | ¼ cup | Packed measurement |
| Salt 🧂 | ½ tsp | Fine sea salt |
| Powdered Sugar 🍚 | ¼ cup | For dusting |
| Vanilla Ice Cream 🍦 | 1 ½ cups | Optional serving suggestion |
The butter is non-negotiable here—European-style unsalted (like Plugrá or President) gives the best flakiness. Grocery store brands work too, but keep it cold when mixing. If your butter's been sitting out, pop it in the freezer 10 minutes first. For the apples, Honeycrisp or Granny Smith hold up best during baking—peel and slice them evenly so they cook at the same rate. I usually grab mine at Whole Foods or the produce section of Trader Joe's when they're in season.
No Ceylon cinnamon? Regular ground cinnamon works, but you might taste a slightly bitter note. Nutmeg too strong? Skip it entirely—the cinnamon carries the flavor. Running low on brown sugar? White sugar plus 1 tbsp molasses mimics the molasses flavor. For the dough, if it feels too sticky, add 1 tbsp more flour. Too dry? Add 1 tsp ice water. The egg wash? Separate the yolk—beat the white until frothy, then mix with the yolk for extra shine.
Store unbaked tart shells in the fridge for up to 2 days (wrapped tightly), or freeze them for 1 month—just bake straight from frozen. The filling can be prepped ahead and kept in the fridge for 3 days. Once baked, these keep at room temp for 2 days or in the fridge for 5 days. I always make a double batch—half get eaten fresh, half get frozen. Reheat in a 350°F oven for 10 minutes to revive the crust.
Why You'll Love This Recipe
- No-Roll Crust Magic: The dough comes together with just flour, butter, sugar, and ice water—no food processor, no fuss. I swear, the cold butter blends into flaky layers with barely a few strokes of a fork.
- Spiced Apple Bliss: That caramelized sugar crust meets tender apples—warm cinnamon, a hint of nutmeg, and just enough tartness. Honestly, the first bite makes me want to make it again the same day.
- Weeknight Crowd Pleaser: Perfect for potlucks, office parties, or when your kid’s soccer team shows up hungry. Slice it, serve it—no plates needed if you’re feeling lazy.
- Budget-Friendly Luxury: Uses pantry staples, costs next to nothing, but tastes like a bakery showstopper. I’ll be real: my grocery bill didn’t flinch, but my guests acted like I’d hired a pastry chef.
Step-by-step instructions for rustic apple pie tarts
Here's how to make these buttery, flaky tarts with a perfect spiced apple filling.
Make the Tart Dough
In a large mixing bowl, combine the 2.5 cups all-purpose flour and 0.5 tsp salt. Cut in the 1 cup cold unsalted butter using a pastry cutter or your fingers until the mixture resembles coarse crumbs with pea-sized butter pieces remaining. This texture is key for flaky layers.
Add the 0.25 cup granulated sugar and mix until evenly distributed. Pour in the 0.5 cup ice water all at once and gently stir with a fork until the dough just comes together. Avoid overmixing—just combine until it holds when pressed. Turn the dough onto a lightly floured surface and knead lightly for 30 seconds to smooth it out.
Wrap the dough tightly in plastic wrap and refrigerate for at least 1 hour (or up to 24 hours). Chilling relaxes the gluten and makes rolling easier. Real talk—don't skip this step or your tarts might shrink in the oven.
Prepare the Apple Filling
Peel, core, and slice the 4 medium apples into ¼-inch thick slices. Toss them with the 1 tbsp lemon juice, 0.25 cup light brown sugar, 2 tsp ground cinnamon, and 0.5 tsp ground nutmeg in a large bowl. Let them sit for 10 minutes while you roll out the dough—this lets the flavors meld and the apples soften slightly.
Here's the thing—don't skip the lemon juice. It prevents the apples from turning brown and adds a bright contrast to the warm spices. If your apples are particularly juicy, you might want to pat them dry with a paper towel before tossing with the spices.
Roll and Assemble the Tarts
Preheat your oven to 375°F. On a lightly floured surface, roll out the chilled dough to about ⅛-inch thickness. Cut it into 8 equal rectangles (about 3x4 inches each) using a sharp knife or pizza cutter. You'll want to work quickly to keep the dough from warming up.
Place each dough rectangle on a parchment-lined baking sheet. Arrange the apple slices on top, slightly overlapping them in concentric circles. You should have about 4-5 apple slices per tart. Sprinkle each tart with a pinch of the extra granulated sugar for that classic caramelized touch.
Bake Until Golden and Bubbly
Bake the tarts for 25-30 minutes until the crust is golden brown and the apples are tender when pierced with a knife. The edges should be puffed and slightly crisp, while the centers should still have a little bite. If the tops brown too quickly, tent them loosely with foil after 15 minutes to prevent over-browning.
I like to check for doneness at the 20-minute mark—your oven might run hot, so start checking early. The filling should be bubbling and the crust should be set but still tender. Let the tarts cool on the baking sheet for 10 minutes before transferring to a wire rack.
Serve Warm with Ice Cream
While the tarts are still warm, dust them generously with powdered sugar using a fine-mesh sieve. This adds that classic pie tart finish and balances the spiced apples beautifully. Serve immediately with 1.5 cups vanilla ice cream on the side for scooping.
Here's where it gets fun—let everyone customize their tart with extra ice cream or a drizzle of caramel sauce. The contrast of warm, spiced apples with cool vanilla ice cream is what makes these tarts irresistible. Enjoy them right away while the crust is still crisp and the filling is warm through.
Pro Tips For Making Rustic Apple Pie Tart
- CHILL THE DOUGH: After mixing your butter and flour, wrap the dough in plastic and refrigerate it for at least 2 hours—yes, even if you’re impatient like me. This prevents the butter from melting into a greasy mess when you roll it out, and the crust will hold together better when blind-baking. I learned this the hard way after my first tart looked like a sad, floppy pancake.
- USE COLD BUTTER: Cut your unsalted butter into the flour using a pastry cutter or your fingers—keep it cold the whole time. Warm butter makes the dough tough, and you’ll end up with a crust that’s more like a cracker than a tender base. If the butter starts to soften, pop the bowl in the fridge for 10 minutes.
- DON’T OVERWORK THE CRUST: Handle the dough as little as possible—just enough to shape it into a disc. Every extra fold or stretch develops gluten, which turns your rustic tart into a chewy biscuit. Press it gently into the tart pan, then let it rest before rolling. Trust me, it’ll thank you later.
- BLIND-BAKE UNTIL GOLDEN: Cover your crust with parchment and pie weights (or dried beans), then bake at 375°F (190°C) until the edges are just starting to brown—about 15-20 minutes. Remove the weights, prick the bottom with a fork, and bake another 5 minutes until the base is crisp. Underbaking leads to a soggy bottom, and nobody wants that.
Troubleshooting great rustic apple pie tart
Crust Too Puffy?
If your tart crust puffs up excessively during baking, it's likely overproofed or the oven temperature fluctuated. First, make sure your dough chills for exactly 1 hour—no more, no less.
I've found that using a digital thermometer (like the Thermoworks Oven Thermometer) ensures your oven stays at 375°F consistently. If puffiness persists, roll the dough slightly thinner (⅛-inch instead of ¼-inch) before baking. 🌡️
Filling Too Watery?
Watery filling usually means the apples released too much juice during baking. To fix this, pat your apple slices dry with a paper towel before assembling the tarts.
I also recommend pre-cooking the filling for 5 minutes on the stovetop before adding it to the crust—this reduces moisture and helps thicken the mixture. If you're in a hurry, sprinkle 1 tsp cornstarch over the filling before baking to absorb excess liquid.
Apples Not Cooked Through
Undercooked apples often happen when the tart shells are too thick or the oven isn't hot enough. First, verify your oven temperature with a thermometer—many home ovens run 25°F cooler than set.
If the apples are still firm after 30 minutes, tent the tarts with foil and bake for another 10 minutes. For extra insurance, slice your apples slightly thinner (⅛-inch instead of ¼-inch) to ensure even cooking.
Crust Too Pale?
A pale crust usually means insufficient baking time or an egg wash that's too thin. Brush the tarts with a slightly thicker egg wash (mix 1 egg yolk with 1 tbsp water instead of just egg white) for a richer color.
Bake for an additional 5 minutes if needed, but watch closely to avoid over-browning. For extra shine, broil the tarts for 1-2 minutes at the very end—just keep an eye on them to prevent burning. 💛
Tarts Shrinking?
Shrinking is often caused by over-handling the dough or insufficient chilling. Make sure your dough rests for the full 1 hour in the fridge before rolling. Also, avoid pressing down on the crust while assembling—this can cause it to shrink further during baking.
If you've already assembled the tarts and notice them shrinking, gently press a fork into the edges to create a slight rim before baking to help maintain their shape.
Filling Too Dry?
Dry filling typically happens when the apples were prepped too long before baking or the sugar content was too high. To fix this, reduce the brown sugar to 0.2 cup instead of 0.25 cup and add 1 tbsp apple cider to the filling mixture for extra moisture.
If you're reheating leftover tarts, add a splash of water or apple juice to the filling and bake at 350°F for 10 minutes to revive the texture.
Nutrition facts
Frequently asked questions
Can I use frozen apples instead of fresh?
Yes, but thaw and drain them first! Use 4 cups frozen apples (about 4 medium apples' worth) and pat them completely dry with paper towels before tossing with spices. Frozen apples release more moisture, so you may need to reduce the brown sugar by 1 tbsp to prevent a soggy filling.
How do I make these gluten-free?
Swap the all-purpose flour for a 1:1 gluten-free baking flour blend (like Bob's Red Mill) and add ½ tsp xanthan gum to the dough. Use ¼ cup extra ice water since gluten-free dough tends to be drier. Chill the dough for 2 extra hours to prevent cracking during baking.
Can I bake these in a muffin tin for mini tarts?
Roll the dough to ⅛-inch thickness and cut into 12 small circles (about 2-inch diameter). Press into greased muffin cups, fill with 3-4 apple slices each, and bake for 18-22 minutes at 375°F. The smaller size means they'll bake faster and stay crisp longer.
What's the best way to store leftovers?
Let cooled tarts sit at room temperature for 2 hours before storing. Keep them in an airtight container for up to 3 days. For longer storage, freeze baked tarts (without powdered sugar) for up to 3 months. Reheat frozen tarts at 350°F for 10 minutes to restore crispness.
Can I make the crust ahead of time?
Yes! Bake the tart shells 1 day ahead and store them in a single layer on a baking sheet at room temperature. For best results, reheat empty shells at 350°F for 5 minutes before adding filling to prevent sogginess. The filling can be prepped and refrigerated separately for up to 3 days.